STEMCO has provided the trucking industry with reliable wheel seals for more than 60 years. Throughout our history, we have recognized the need for tougher, longer-life seals that meet the performance expectations of each fleet, all in an effort to maximize performance and value.
The Voyager wheel seal is designed for regional route trucks, city traffic and coach applications. Rugged design, simple installation and proven performance make Voyager the right choice for fleets seeking a superior seal for everyday stop-and-go traffic environments.
Discover seals feature a high-grade temperature-resistant HNBR-PTFE material and multi-labyrinth sealing features for long-life applications. They are designed for today’s increased highway speeds, and higher temperature air disc brake applications.
The purpose of this tech tip is to inform customers of the proper installation methods for the STEMCO Voyager and Discover wheel seals. We will be referencing the following STEMCO PDFs:
- Voyager and Discover Hub Seal Installation Instructions
- STEMCO-TQM-Catalog
Installation
STEP 1
Remove all burrs from the hub bore and spindle.
Clean and inspect the spindle, threads, and seal shoulder. These areas are to be free of debris, rust, weld splatter, and loose particles or build up of any type. Thoroughly clean the entire wheel cavity.
Do not apply any sealant to the spindle shoulder. Apply a light coat of lubricant to spindle surfaces.
STEP 2
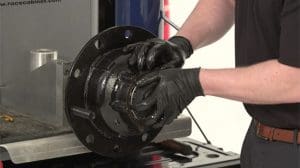
Orient the hub such that the inner bearing cup is up, pre-lube the inner bearing and place it into the bearing cup.

When using grease, pre-pack the inner bearing before placement into the hub.
STEP 3
Place the seal on the recommended STEMCO Installation Tool, with the correct head, so that the words “Air Side” face into the tool.
Place the tool (with the seal correctly mounted in the tool head) over the hub bore. Use a heavy hammer to drive against the end of the tool. Drive seal into bore until complete bottoming is assured.

Remove Tool.
Apply a thin layer of lubricant on the ID surface of the seal. Do not apply lubricant to the OD of the seal. Do not apply sealant to the seal OD or ID.
STEP 4
With the wheel mounted on a dolly, carefully align the bore with the spindle.

Gently push the wheel assembly onto the spindle to the proper position.
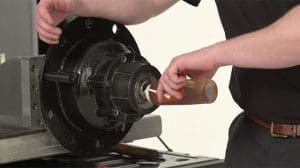
Be careful not to bump the top of the seal against the axle. Fill the hub cavity with lubricant until it runs over the outer bearing cup. Coat the outer bearing with lubricant and place it on the spindle and into the bearing cup.
When using grease, pre-pack the outer bearing before placement into the hub.
Support the hub with the lifting device until the outer bearing and wheel-end fastener have been installed to a hand tight condition to prevent cocking of the hub/seal.
STEP 5
Assemble the inner nut and tighten it to 200 ft-lbs.

Rotate the wheel several times and then back-off nut one full turn. Make final bearing adjustment according to TMC recommended bearing adjustment procedure. Install the appropriate axle fastener.
STEP 6
Install the hub cap with a new gasket and fill the cavity with lubricant to the proper level. On drive axles, be sure the differential oil level is high enough (manufacturer’s recommended level) to ensure oil flow through the tube to the wheels.
It is recommended to jack-up one side and then the other until flow starts. Make certain the breather plug is clear. Recheck steers and trailers to insure proper fill levels
If you would like more information on our STEMCO Voyager and Discover wheel seals, visit our product pages.
To access our full library of Tech Tips, click here.
For in-depth articles covering industry news and trends, product spotlights, case studies, customer insights, and “thought leadership” topics from STEMCO professionals, visit The Wheelhouse Blog.


