Proper wheel bearing adjustment is critical to the performance of wheel seals and other related wheel end products. For that reason, we are proud to be a part of TMC’s Wheel End Task Force. We are happy to bring these standards to you in the form of this technical guide. Working together, in this way, STEMCO helps keep your rigs rolling.
The following seven step bearing adjustment recommendation was developed by TMC’s Wheel End Task Force. It represents the combined input of manufacturers of wheel end components. We will be referencing the following STEMCO PDF:
Wheel Bearing Adjustment
STEP 1
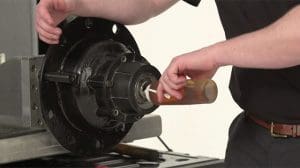
Bearing Lubrication
Lubricate the wheel bearing with clean lubricant of the same type used in the axle sump or hub assembly.
STEP 2
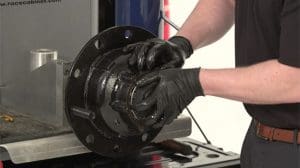
Initial Adjusting
Nut Torque: Tighten the adjusting nut to a torque of 200 ft-lbs. while rotating the wheel.
STEP 3
Initial Back-Off
Back the adjusting nut off one full turn.
STEP 4
Re-Torque Adjustment
Re-Torque adjusting nut to 50 ft-lbs while rotating the wheel.
STEP 5
Final Back-Off
See Chart A
STEP 6
Jam Nut Torque
See Chart B
STEP 7
Acceptable End Play
Refer to Page 21 of the STEMCO catalog for measuring and play
Bearing Adjustment Procedure for Single Castellated Nut
STEP 1
Torque the Castellated Nut to 200 ft-lbs.
STEP 2
Back the nut off 1/2 to 1 full turn and rotate wheel assembly.
STEP 3
Re-torque Castellated Nut to 75 ft-lbs while wheel assembly is rotated.
STEP 4
Lock Castellated Nut in place with a new cotter pin through one of the two holes drilled in the axle. If at 75 ft-lbs you are not on a hole, back the nut off to the closest hole and lock in place with the cotter pin.
STEP 5
Due to Castellated Nut configuration, variation in bearing adjustment can be significant.
STEP 6
Always check end play after final adjustment and lock down.
To access our full library of Tech Tips, click here.
For in-depth articles covering industry news and trends, product spotlights, case studies, customer insights, and “thought leadership” topics from STEMCO professionals, visit The Wheelhouse Blog.


