Safety relies on ensuring the health of these critical steering components
What do tie rods do?
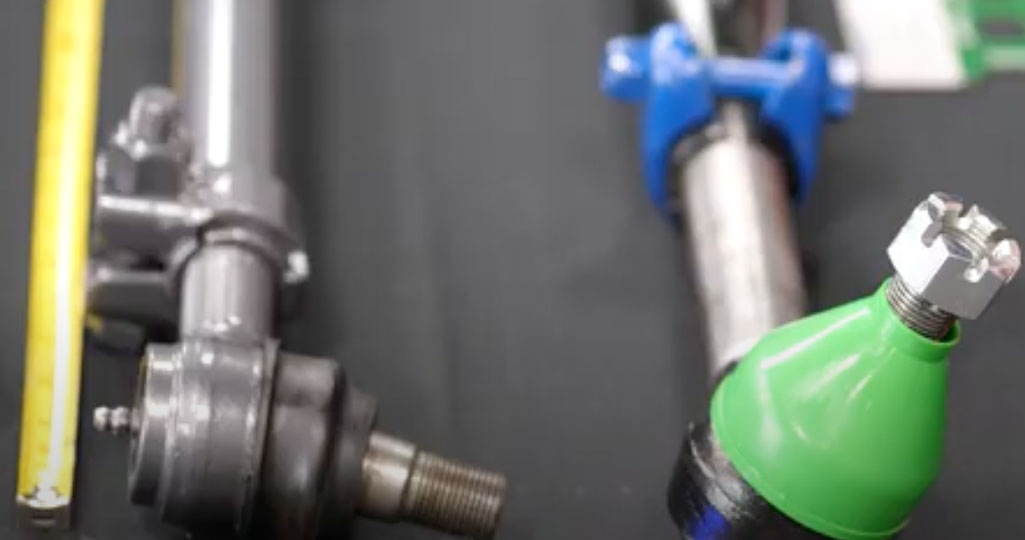
Tie rods are critical truck components that play an important part in steering. They’re called tie rods because they “tie” or link both steering knuckles for uniform steering movement, maintaining proper wheel alignment and steering control.
How long do tie rods last?
Tie rods are wearable parts, and although they can last for several years, they eventually need to be replaced over the life of a vehicle. How long tie rods last is directly related to the amount of wear and tear they undergo. If you think about it, a tie rod is used every time you steer, so driving on winding roads as opposed to straightaways will hasten wear. Other factors that lead to wear or damage are bad road conditions, accidents and potholes.
How do you know if a tie rod is bad?
Tie rods can give off telltale signs that they’re damaged or worn. Things you should be on the look out for include:
- Uneven tread wear
When a vehicle is properly aligned, your tires should wear equally. But, when a rod goes bad, the alignment can get thrown off and tires might wear unevenly. To inspect tires, look at the inside and outside edges of the tread. If you see a lot of wear on one side and not on the other, there could be a problem with the tie rods. - Poor front end alignment
Tie rods help your truck steer, so naturally, when they’re going bad, the wheels may come out of alignment. When a vehicle is out of alignment it might be hard to keep the vehicle from pulling to one side or the other. Sometimes, correcting bad alignment only requires small adjustments in your steering that are not noticeable individually, but can be detectable cumulatively in that driving may feel more tiring. - Unresponsive steering
Worn or loose tie rods can cause dead zones in your steering, meaning the wheel can feel like it has a lot of play before you get a result. - Clunking, shaking and other noises
Vibrations or shaking in the steering wheel or clunking and rattling noises when turning can be a sign that tie rods are starting to wear out.
How do I check a tie rod?
To check a tie rod, you should always refer to original equipment manufacturer inspection procedures and criteria. Inspection procedures vary by manufacturer, but may mirror the following:
- On a level surface, park and secure the vehicle with its wheels straight.
- Raise front wheels off the ground. Support the vehicle with safety stands.
- Turn the wheels from left to right. Return to the straight-ahead position.
- Check the tie rod boot for cracks, tears or other damage. Also check the boot seals. If the boot is damaged, the entire rod should be replaced.
- Ensure the tie rod nut is secured with a cotter pin.
- Check to ensure the tie rod end is threaded correctly into the cross tube and installed deeper than the end of the cross tube slot.
- On tie rods with grease fittings, make sure grease fittings are installed.
- By hand or using a protected pipe wrench, rotate the cross tube toward the front of the vehicle and then toward the rear. Then center the cross tube between the stop positions. If the cross tube won’t rotate, both tie rods should be replaced.
- Stand directly below the ball stud socket. Using both hands, grab the assembly end as close to the socket as possible.
- Push and pull the assembly, checking for movement at both tie rod ends. Movement indicates rods need replacement.
- Finally, inspect the cross tube and clamps for damage and replace if needed.
More detailed inspection steps for QwikTie tie rod assemblies can be found here.
How long can you drive with bad tie rods?
Tie rods are essential components of your vehicle’s steering system, so driving on a damaged one is not recommended for your safety as well as the safety of others.
What to know about changing a tie rod?
If you’ve determined that a tie rod needs to be replaced, a good choice is STEMCO’s QWIKTIE™ tie rod assembly. What’s great about QWIKTIE is that it is mostly universal in that two part numbers cover 80% of straight tie rod assemblies.
What do I need to change a tie rod?
To change a tie rod, you need basic hand tools, a torque wrench, tape measure, grease gun, and PPE (safety glasses and gloves).
How long will it take to change a tie rod?
Installation should take approximately 15 minutes, not including the time required for an alignment. Note: An alignment must be performed immediately after tie rod replacement.
How do I change a tie rod?
Assuming you’re using STEMCO’s QWIKTIE tie rod, follow these easy steps:
- Use the gauge that comes with the kit to determine the required application.
- Check the minor OD with the same gauge or a micrometer.
- Measure the old assembly from grease zerk to grease zerk to ensure the new assembly is as long as required.
- Thread out the new assembly, keeping it even on both sides.
- Put on PPE, including safety glasses and gloves.
- Remove the castle nut and green protector on either side using a proper tie rod removal tool.
- Thread the castle nut on both sides of the assembly on the vehicle with 250 ft/lbs of torque.
- Torque the clamps with 60 ft/lbs of torque.
- Install the new (cotter) keys on the castle nuts.
- Have an alignment performed to prevent excessive tire wear.
Where do I learn more about tie rods?
To get more detailed directions on installing QWIKTIE tie rod assemblies, you can watch this video. You can also contact a STEMCO representative regarding any further information you may need.


